When it comes to owning a home, the safety of you and your family is a necessity. You will want to inspect the home to ensure all areas are safe and secure. This includes any handrail or banister associated with your stairs. If you have young children you will want to teach them how to navigate up and down the stairs. Having handrails in place is a great start. How do handrails on stairs help keep you safe? They are a guide and provide stability as you move up and down the stairs.
Let’s take a look below at some more details regarding handrail safety.
What Is A Stair Handrail?
The primary function of a stair handrail is to provide support and stability while walking up or down the stairs. Having something safe to grab onto allows you to navigate the stairs more quickly and confidently. Gliding your hand down the handrail is the key. It is recommended that you use the “tennis-racket grip” to maintain a safe hold on the handrail at all times.
What Is The Purpose Of A Handrail?
Believe it or not, handrails serve a great purpose. Aside from just being something to grab onto while on the stairs, they will provide an aesthetically pleasing sight to your stairs. Let’s take a look below at how handrails on stairs help keep you safe.
Prevent accidents – Handrails are installed to provide you with something to grab onto while navigating up and down the stairs. This keeps you from having accidents if you trip on a step or miss a step.
Provide mobility – For homeowners that might not have great balance, the handrail provides them with more mobility as they can go up and down the stairs in a safe manner.
Liability protection – Having a handrail in place protects any liability on the homeowner. Imagine not having a handrail and someone tripping on your stairs. This would be potential for a lawsuit if someone were to get hurt.
How Can I Make Handrails More Visible?
To increase the safety of a handrail you will want to do a few things to make them more visible. Let’s take a look below at what those things might be.
Take extra precautions on stairs if you happen to wear bifocal glasses.
Consider a matte finish on the treads so that you can avoid any glares.
Improve depth perception by using angular lighting and color contrast.
Don’t use any patterned carpeting. This may hide the depth differences on the stairs.
Other Recommended Maintenance
Now that you know how handrails on stairs are meant to keep you safe you can explore other safety areas in your home. Use a springtime maintenance checklist to ensure that you have the whole home up-to-date.
Next, while you are working to determine if the handrail is safe and secure, you might encounter a dent in your wall. Understanding how to repair dents in your wall will save you from having to hire an additional contractor to repair them for you.
When you purchase or build a home with a second story or a split-level you will want to ensure that the handrail is intact and properly working. Additionally, this should be covered during the home inspection of the purchase. Also, if proper building codes are not followed you will want to have this corrected. For safety reasons, hire a professional to assist with the installation of a new handrail.
https://www.blueguardianhomeinspections.com/wp-content/uploads/sites/178/2023/11/modern_steps_with_a_side_handrail_25.jpeg500750Spectorahttps://d3f55zfyw9z78c.cloudfront.net/wp-content/uploads/sites/178/2021/06/18055450/logo.pngSpectora2023-05-31 00:28:512023-12-19 21:33:20How Do Handrails on Stairs Help Keep You Safe?
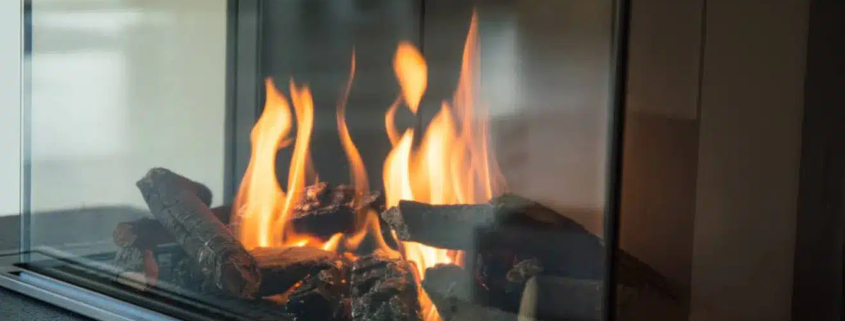
When it comes to owning a home there can be various nuances to the home. Some homeowners enjoy a wood-fired fireplace, while others have gas fireplaces installed. No matter which one you have in your home, you must understand the maintenance needs. Having a fireplace is an exciting amenity, but should not be taken lightly. Gas fireplaces can be activated in a variety of ways. One of those is by using a wall key. Wondering how to turn on a gas fireplace with a wall key? Insert the wall key into the ignition hole and turn the key to open up the gas flow.
Let’s take a look below at some more detailed steps.
What Tools Do I Need?
Believe it or not, only a couple of tools are necessary to complete this project. You will need the following items for this project:
Gas fireplace wall key for wall switch
Long matches or a kitchen lighter
Where Is It Located?
With the gas fireplace, there is a gas valve knob that prevents the flow of gas when the fireplace is not in use. Luckily, you can partially or completely open the gas valve knob as you require a gas flow for your fireplace. In this case, there is a round metal flange that consists of a square or hex hold in the center. This is your gas valve knob. You can find this on either wall side about a foot off the floor. Additionally, they can be located at ground level on the fireplace apron or ground level on the flooring of the actual fireplace.
What Are My Steps?
Just like any project, there are steps for using the wall key to ignite your gas fireplace. Let’s take a look below at the recommended steps.
Find the gas valve knob – Locate the gas valve knob on the wall or floor of the fireplace. Keep the wall key close to the unit so that you don’t lose it.
Open the fireplace – It is necessary to open the glass doors or screen of the fireplace.
Find the ignition area – You will see a pipe with holes or valves. This is where the pilot light to light the fireplace is located.
Get your lighter ready – Have your long matches or lighter ready to go, once you open the gas flow.
Use the key – Insert the wall gas metal key into the valve and make sure it is a clean fit.
Slowly turn and open – Rotate your wall key a quarter of a half turn in the counter-clockwise direction. It is important to slowly open the valve so that you do not flood your fireplace with a massive amount of gas.
Light the gas – Use your lighter or matches and light the gas.
Continue to open the valve – Once the flame is lit, you can continue to turn the gas valve in the counter-clockwise position. Continue opening until the valve stops. If you want the flame to stay short turn the valve down. Just be careful not to turn it too far or the flame could go out.
Remove the wall key – Be sure to remove the wall key once you have your gas flow set. You don’t want to accidentally break off the wall key or mistakenly turn off your flame.
Turn off the gas flow – When you have finished using your gas fireplace, replace the wall key and turn the valve clockwise until it completely stops turning to close the gas valve. You will notice the flame begin to simmer down and eventually go out.
Other Recommended Maintenance
Now that you know how to turn on your gas fireplace with a wall key, you can begin reading up on if your gas fireplace needs to be cleaned. Chances are this is a good idea to prevent residue from the gas flames from building up on your fireplace.
Next, be sure that you understand the by-product of your gas fireplace. It might be a good idea to install carbon monoxide detectors in your home in case your gas fireplace is giving off too much carbon monoxide.
Lastly, while you are working to maintain your gas fireplace, this might be time to maintain other areas of the home. For example, changing the air filter in your HVAC unit should be done on a semi-annually timeline. If you use your HVAC system a lot and have pets in the home, you might want to consider changing the air filter more often than every 6 months.
When Do I Call A Professional?
If you are struggling to light the gas fireplace with your wall key, there may be an issue with the gas line. Call on your local master plumber that has experience working with gas lines. They can troubleshoot what is happening with the lack of gas flow to your fireplace, or determine if there is a gas leak. Also, reach out to your local home inspection team for an equipment inspection. Additionally, they can recommend a reputable master plumber or gas company to assist.
Conclusion
Knowing the ins and outs of your gas fireplace is important for the safety of you and your family. Additionally, having the common sense when you smell gas to shut everything off and get your family to safety is key. If you smell gas, you should call on your local home inspection team to inspect all of your home systems. Additionally, they can bring in a master plumber with gas line experience. Call on Blue Guardian Home Inspections for a full home inspection in Kendall, Kane, Dupage, and LaSalle Counties of Illinois.
https://www.blueguardianhomeinspections.com/wp-content/uploads/sites/178/2023/11/gas_fireplace_25.jpg9061318Spectorahttps://d3f55zfyw9z78c.cloudfront.net/wp-content/uploads/sites/178/2021/06/18055450/logo.pngSpectora2023-05-15 00:45:072023-12-19 21:34:02How to Turn on A Gas Fireplace with A Wall Key
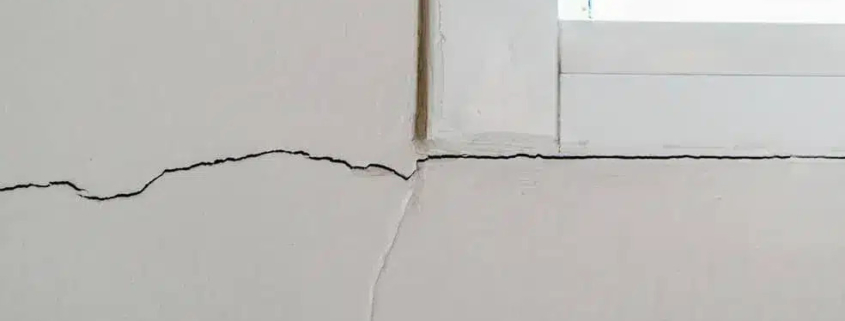
Winter is ending and spring is around the corner. This means it is time to do some springtime maintenance. Whether you have just built your home or purchased an older one, there is always some spring maintenance to do. Cracks will appear in ceilings and walls and you will want to make the necessary repair promptly. At the same time, you want to look at a springtime maintenance checklist to ensure you take care of your home for the upcoming months. What causes cracks in walls and ceilings? Ground shifting during home settling can cause cracking. Also, moisture damage and ceiling weight.
Let’s take a look below at some more specifics regarding cracking in your walls and ceiling and some spring maintenance ideas.
How Many Types Of Cracks Are There?
Believe it or not, there are about 6 different types of cracks that can be referenced in a home. The names of these cracks will vary based on the type of crack. Let’s take a look below at what those are.
Hairline Ceiling Cracks
These cracks are typically caused by a drywall mud issue or a plastering problem. These cracks are fairly standard as the walls and ceilings expand and contract from humidity and moisture. Additionally, they are not structurally concerning.
Straightline Ceiling Cracks
You will often see this type of crack in your ceiling if the drywall installer did not use the proper amount of plaster. Also, these types of cracks are caused by the installer not doing their job. They are not structurally concerning.
Yellow or Brown Ceiling Cracks
These cracks are indicative of a water leak. Additionally, you will want to inspect the attic and other areas of the home for potential water leakage.
Spiderweb Ceiling Cracks
Once the home begins to settle, it becomes uneven. To what extent depends on how much pressure the home is putting on the ground underneath. Spiderweb ceiling cracks are a structural concern. Also, you should have a structural engineer take a look at your home.
Cracks Between the Ceiling and Walls
Truss uplifting causes cracks in walls and ceilings, they are likely caused by truss uplifting. The truss is the frame of your roof and ceiling. When extreme weather or winds come into play, the trusses can expand more than usual. This causes the truss to pull away from the ceiling and create an issue.
Bowed Ceiling and Large Ceiling Cracks
The moment that you notice a bowing ceiling and any large ceiling cracks you will need to call a structural engineer. At this time, there is major structural damage occurring. Water damage and foundation settling could be the culprits.
What Causes Cracking In A Home?
Believe it or not, what causes cracks in walls and ceilings can be attributed to two main issues. Poor workmanship and the natural setting of the home are the main reasons. Also, springtime maintenance can reduce these issues. Let’s take a look below at what can cause this to occur.
Foundation Issues
As the house settles, the foundation can shift. If the foundation was not supported correctly, then it will cause other structures in the home to break down. As more stress is placed on other structures of the home, cracking can occur.
Moisture Damage
Anytime that water touches a material like drywall, it begins to break down. The moisture from a leaking roof or pipes can break down the materials that make up your ceiling. This will cause the paint to start cracking and chipping.
The Top Floor is Too Heavy
If you have a second floor and the rooms do not have strong support, the weight of the floor above the ceiling will start to put pressure on the underlying ceiling. Second-floor bathrooms are typical culprits of this issue. Also, placing too many boxes and heavy containers in the attic will put pressure on the underlying ceiling.
The Drywall was Poorly Installed
If the contracting company that completed the drywall installation did a poor job and rushed the material installation, you could end up with cracking. Additionally, if the drywall that was used happened to be a poor product, it will break down quicker and cause cracking.
Old Age
The older the home the more you will need updating and repairs. Keep in mind, it is common to see cracks and structural changes in your home as it ages. Don’t panic. Take an aggressive approach and make the repairs promptly. This ensures that further damage does not continue to occur.
Will A Spring Maintenance Checklist Help Me With This?
Yes, keeping a spring maintenance checklist and other seasonal maintenance checklists will help you avoid the destruction of a crack in your ceiling and walls. Let’s take a look below at what we can do to ensure our house stays structurally sound.
Inspect the roof – No matter what type of roof you have, inspecting the roof is necessary to keep the structural integrity of your home intact. This allows you to discover any water leaks or degraded materials that will need replacing.
Repair the cracked paint – At this time, it is a good idea to re-paint any cracked or peeling paint areas. This will keep your home looking fresh and clean for springtime.
Clean the gutters – Hire a company or get on a ladder and sweep your gutters clean. Cleaning out the gutters will reduce the stress on your walls and roof. Also, this will ensure that the gutters will not clog and cause water damage.
Clean and repair any screening – If you have a screen enclosure or rips in your window screens, now is a great time to make those repairs.
Check the seals around your doors and windows – Ensure that all seals are safe and secure around your windows and doors. Also, check for cracks and a need for replacement.
Replace your HVAC filters – Keeping your HVAC filters new and clean allows your system to work more efficiently.
Clear any overgrowth around your AC compressor – For the proper airflow to make its way through your air conditioner, it needs space to work. Additionally, keeping vegetation and overgrowth from blocking the airflow is key.
Drain the water heater – As sediment builds up in your tank, it can start to clog the tank. This reduces the efficiency of your water heater. Draining the water heater in the spring will remove the sediment.
Clean the dryer and washing machine – Remove all lint from your dryer vent by vacuuming it. Also, check the washing machine fill hose for cracks or clogging.
Clean the Refrigerator coils – Use a vacuum and suck up any dust from the bottom refrigerator coils. Pull the refrigerator out from the wall and look at the bottom and back of the refrigerator. Also, if you see dirt and debris, you will need to vacuum.
Replace smoke detector batteries – This would be a great time to replace the batteries in your smoke detectors.
Clean all exterior surfaces – This includes cleaning the driveway, decks, patios, fencing, and any other exterior of the home. Use a pressure washer to assist with this project.
Fix and damage to the exterior surfaces – This includes your decking, driveway, fencing, and other exterior surfaces.
Get your lawn equipment ready – Make sure to sharpen the blades and change the oil in your lawn mower. Also, check the fluids in any other yard equipment that you might use.
Other Recommended Maintenance
Now that you understand what causes cracks in walls and ceilings, you can look into other areas that might need repair. Additionally, after you make repairs, you will want to know how to paint your ceilings.
Next, be sure to understand what drywall needs replacing in the home. Replacing wet drywall is highly recommended. However, if you determine that you have caught the problem in time, you could simply use industrial fans to dry out the existing drywall. Of course, you do run the risk of creating a breeding ground for mold and mildew.
Lastly, having a spring checklist is just as important as having a winter checklist. In fact, having a maintenance checklist for all seasons is a great idea. Also, as a homeowner, you don’t want to forget any maintenance needs. Consequently, keeping something like a winter, spring, and summer checklist will help you keep up with the maintenance needs of your home.
When Do I Call A Professional?
Conducting your annual spring maintenance checklist is key for moving into the summer months with a fully functional and energy-efficient home. Additionally, you wouldn’t want to push through the various weather changes in the springtime without a completed checklist. Also, this bodes well for keeping your home from developing cracks in the walls and ceilings of your home. Consequently, reach out to your local home inspection team to get a full assessment of the working parts and structures of your home.
Conclusion
Springtime maintenance is important for the home. Additionally, cracks in your walls or ceilings are clear indicators of some structural damage to your home. Also, in most cases, they are the result of other issues in the home. Consequently, calling on your local home inspection team allows you to get to the bottom of the cracking and other issues. Reach out to Blue Guardian Home Inspections for a full home inspection in Kendall, Kane, Dupage, and LaSalle Counties of Illinois.
https://www.blueguardianhomeinspections.com/wp-content/uploads/sites/178/2023/11/horizontal_foundation_crack.jpg656984Spectorahttps://d3f55zfyw9z78c.cloudfront.net/wp-content/uploads/sites/178/2021/06/18055450/logo.pngSpectora2023-03-28 01:18:532023-12-19 21:35:26Springtime Home Maintenance: Cracks in Walls & Ceilings